
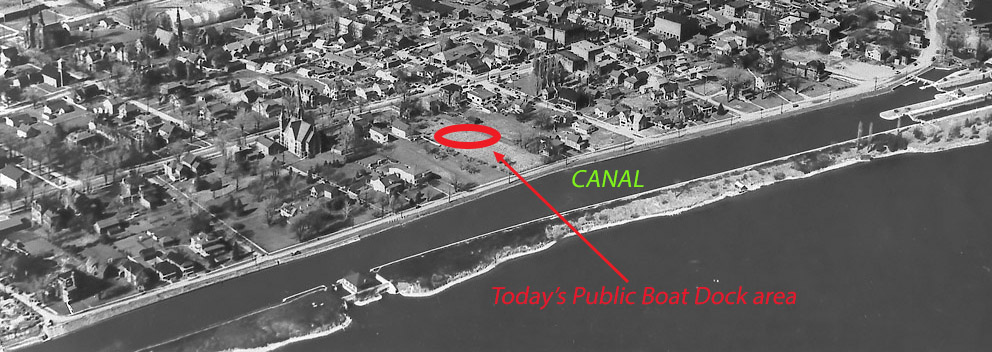
All routes through “the locks” require you to enter upstream in the vicinity of the public boat dock, then drift to the start of the site. From time of entry this takes about 15 minutes but is highly dependent upon current.
Enter the water by either a stride jump off the end of the dock, or walking over the rocks on its upstream side. DO NOT USE THE BOAT RAMP. It is off-limits to divers as it is relatively enclosed and very difficult for boats to see you. Head due south using a compass (there is very little current around the dock) – you’ll descend fairly quickly to 10 feet.


You’re now heading for the canal that fed the locks long, long ago. You can’t see it from the surface (although on a calm day, you can see the slight change in surface water movement) so it’s kind of hard to visualize it as a separate entity within the river that we know.
Where you enter, the bottom of the canal sits at about 33 feet… but that includes the additional 15 feet from the 1959 flooding (see this page). Before that time it would have been about 18 feet deep.
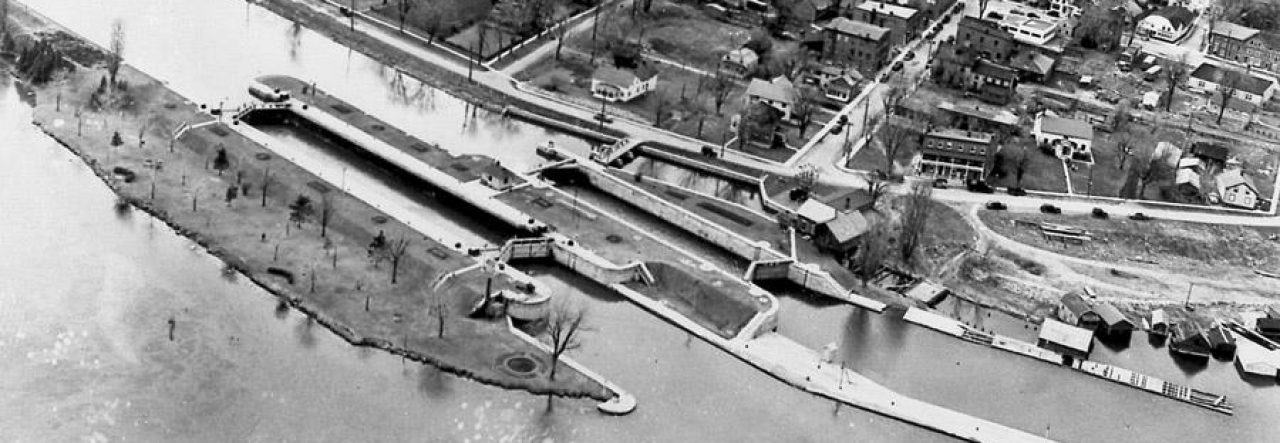
Take a moment to examine this old overhead photo. You can see the man-made canal constructed alongside the St. Lawrence River. You can see the outer wall of the lock running upstream. You can also see Canal Street (strange name, eh?) along with its sidewalk beside the canal.
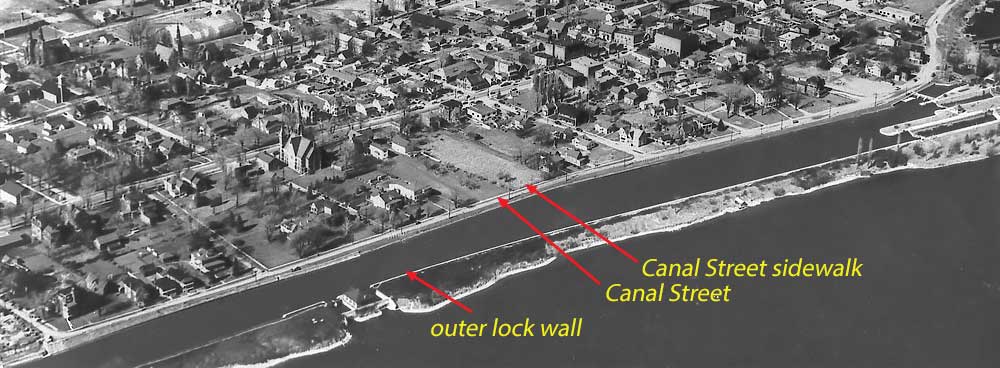
To get to the canal then, you must pass over Canal Street and its sidewalk. The sidewalk is in excellent condition. The street is less so, solid in many spots but overrun by weeds in others with subsequent cracking and breaking.
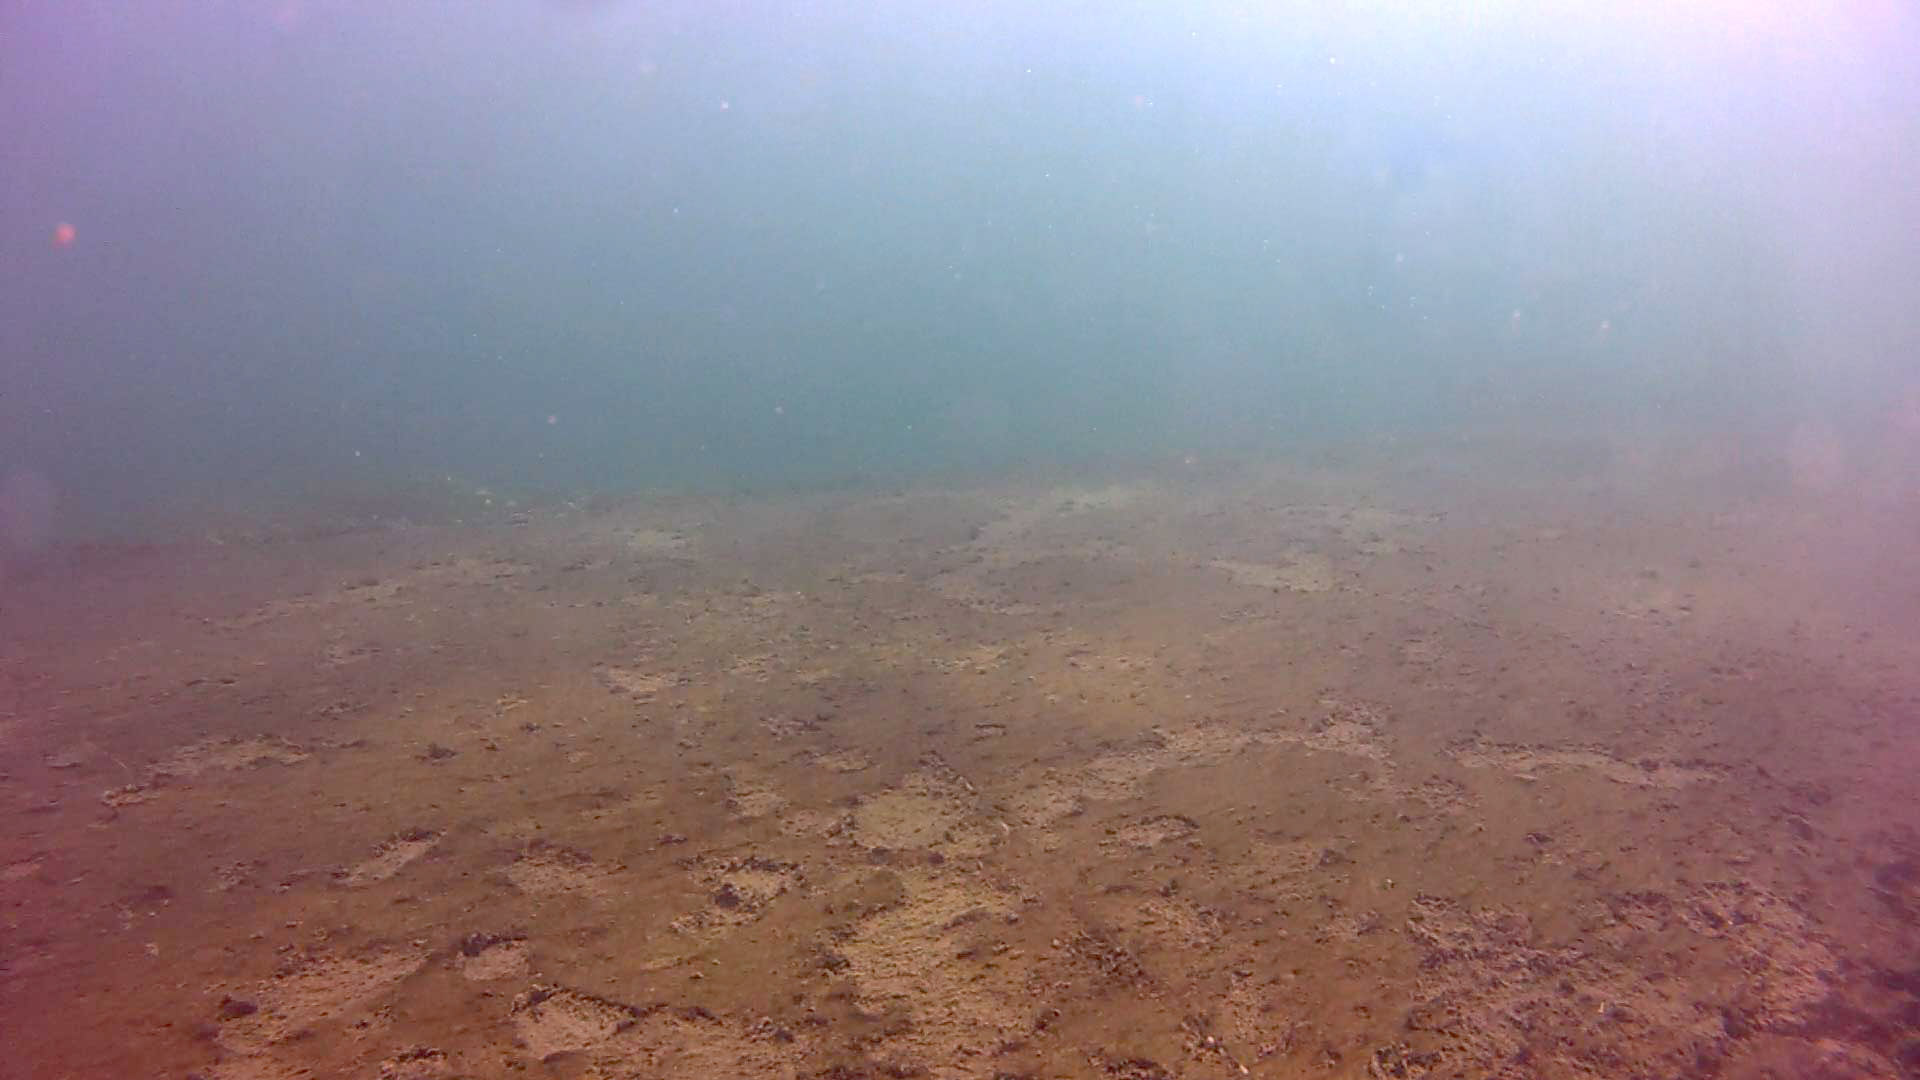
Taking note of Canal Street’s current depth is critical for figuring out how to pinpoint which section of the locks you’re aiming for. It took me a long time to figure this out – we always “guessed” at the depths but the water level can increase or decrease by as much as 2 feet with modern river dam management. Only a couple of seasons ago, it struck me (duh) that despite today’s changing levels, Canal Street (we lovingly call it “the road”) and all the other areas beneath the surface retain their relationship to each other.
So now as I skim over the road on the way out, I always slip my computer down to its surface to record the depth. Then I choose my drifting depth based upon the reading.
You pass over the road pretty quickly and by now the current can be very strong – as you move south, you’ll also be carried east. No worries – you’ve still got a 10-12 minute drift to the locks. Leave the road and descend over the square-stoned sloping wall of the canal. In the video below I took a moment to pan backwards to show you this northern side of the canal (which isn’t easy while trying not to lose your buddy in the current!). On that day I was at about 19 feet, or “road plus 8”.
Ta da! In general, the Hydroelectric plant is “road plus 12-15”, the Rapide Plat Lock is “road plus 16-18”, and Lock 23 is “road plus 19-23”. (I can be even more specific – more about that in a moment).
In 2019, the road depth was pretty consistent at 11 feet in June/July and 10 feet in August. Both of these figures are low (it used to run 12 feet pretty consistently) and may change often as our weather and flooding patterns evolve.
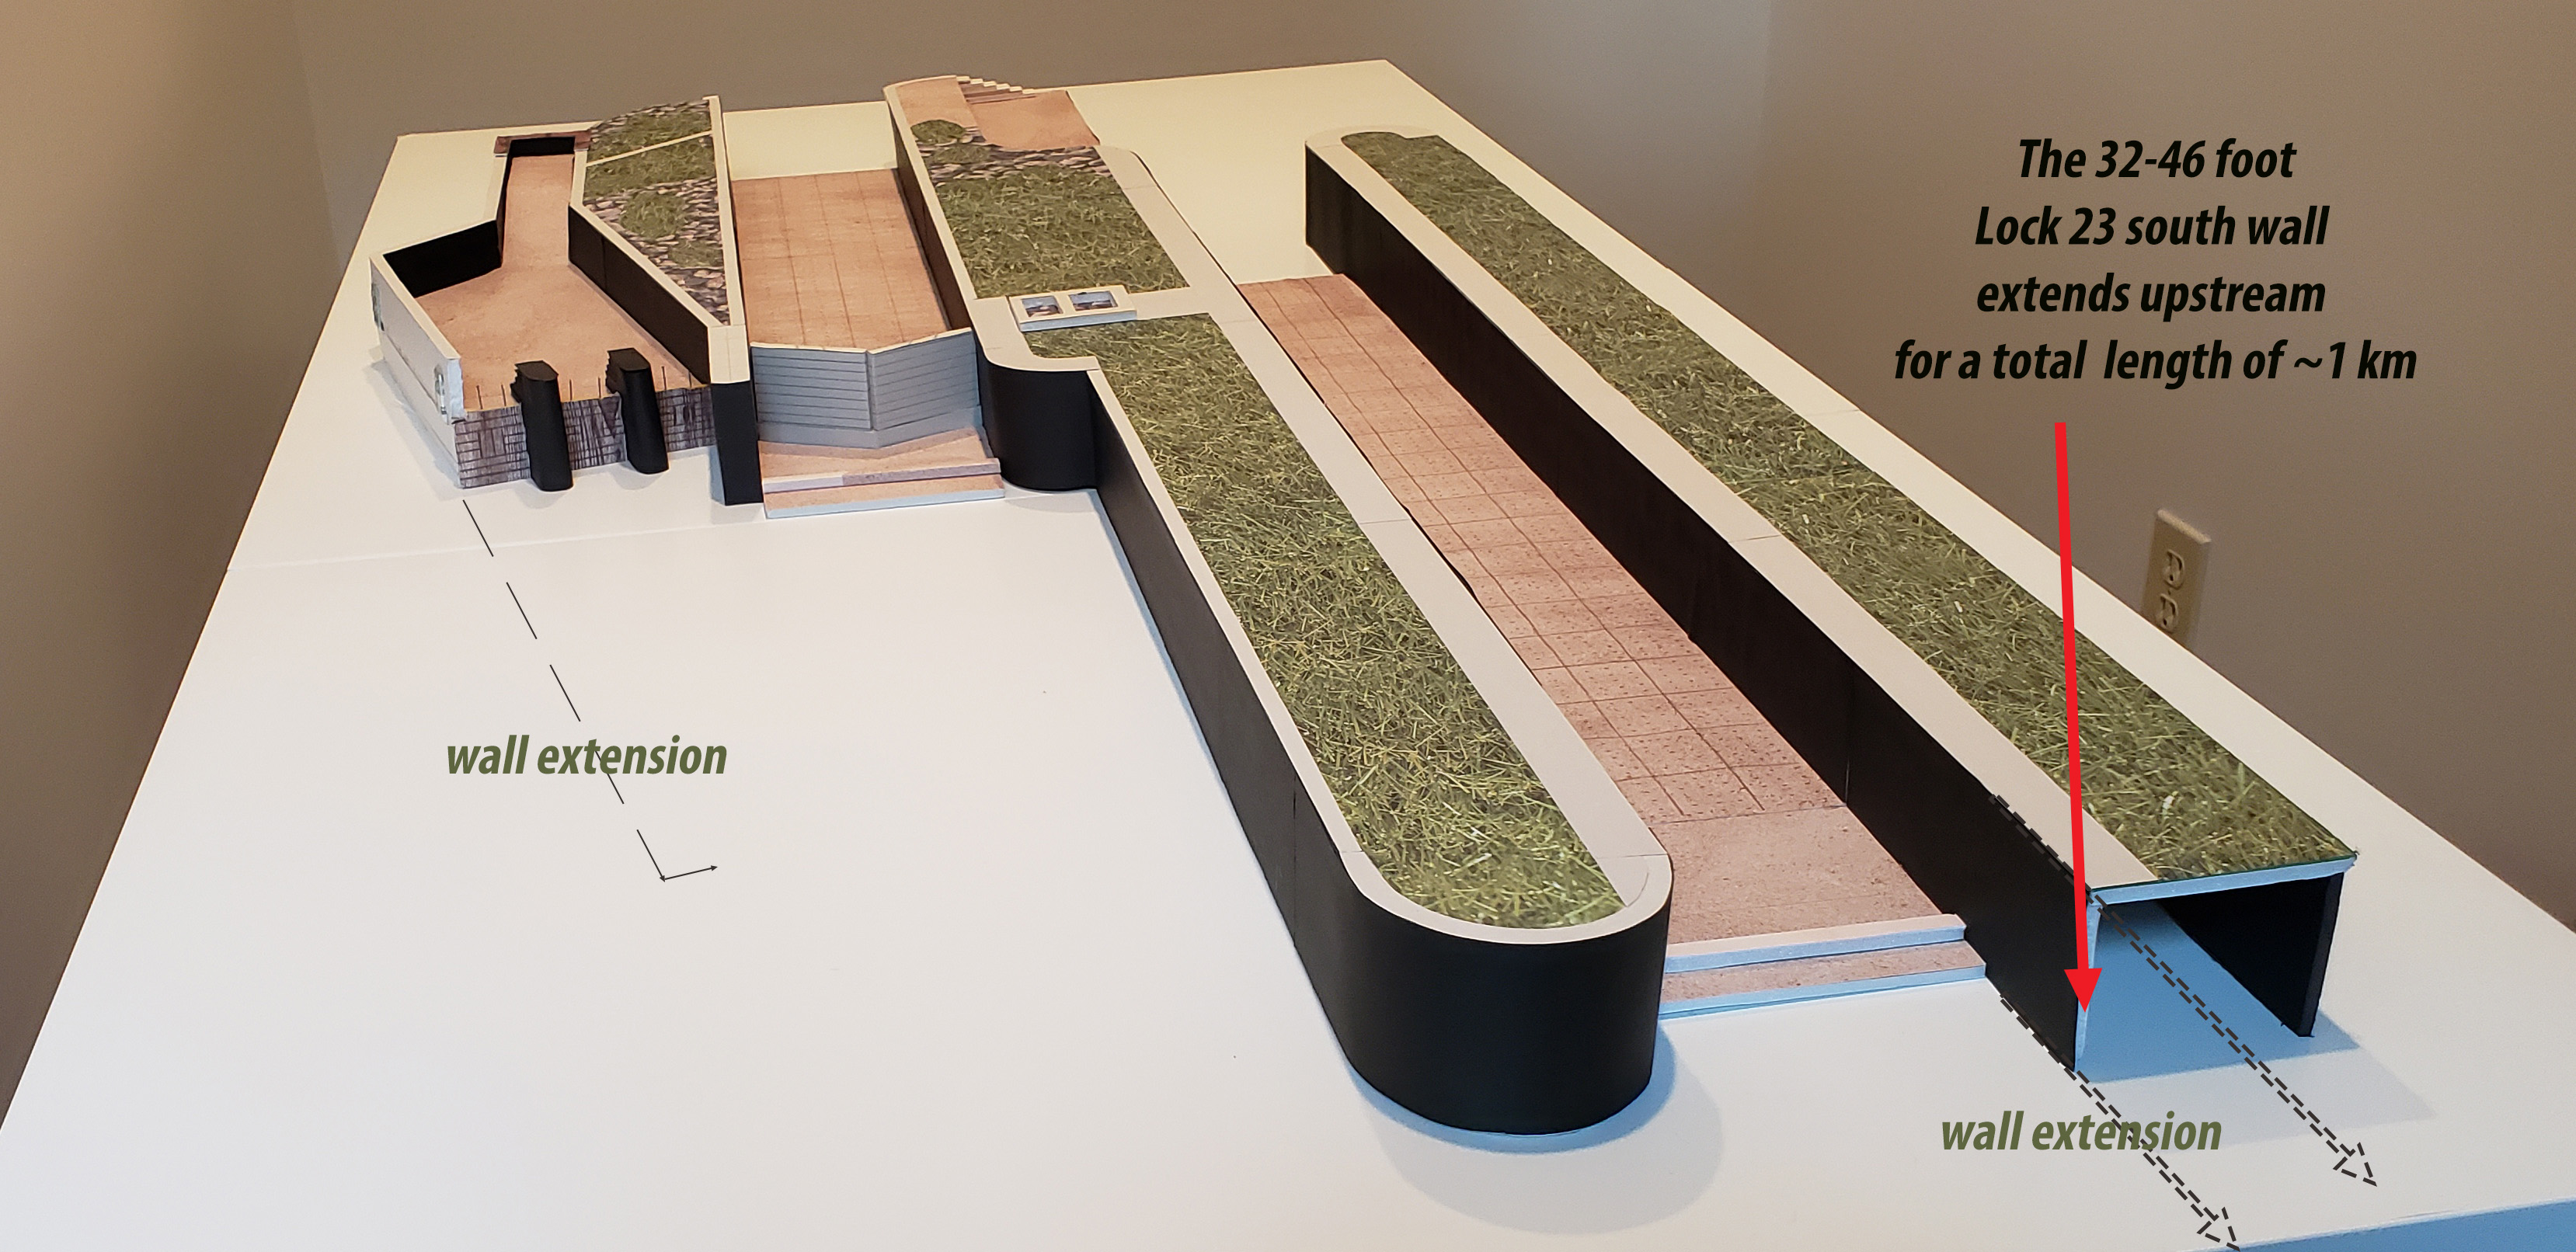
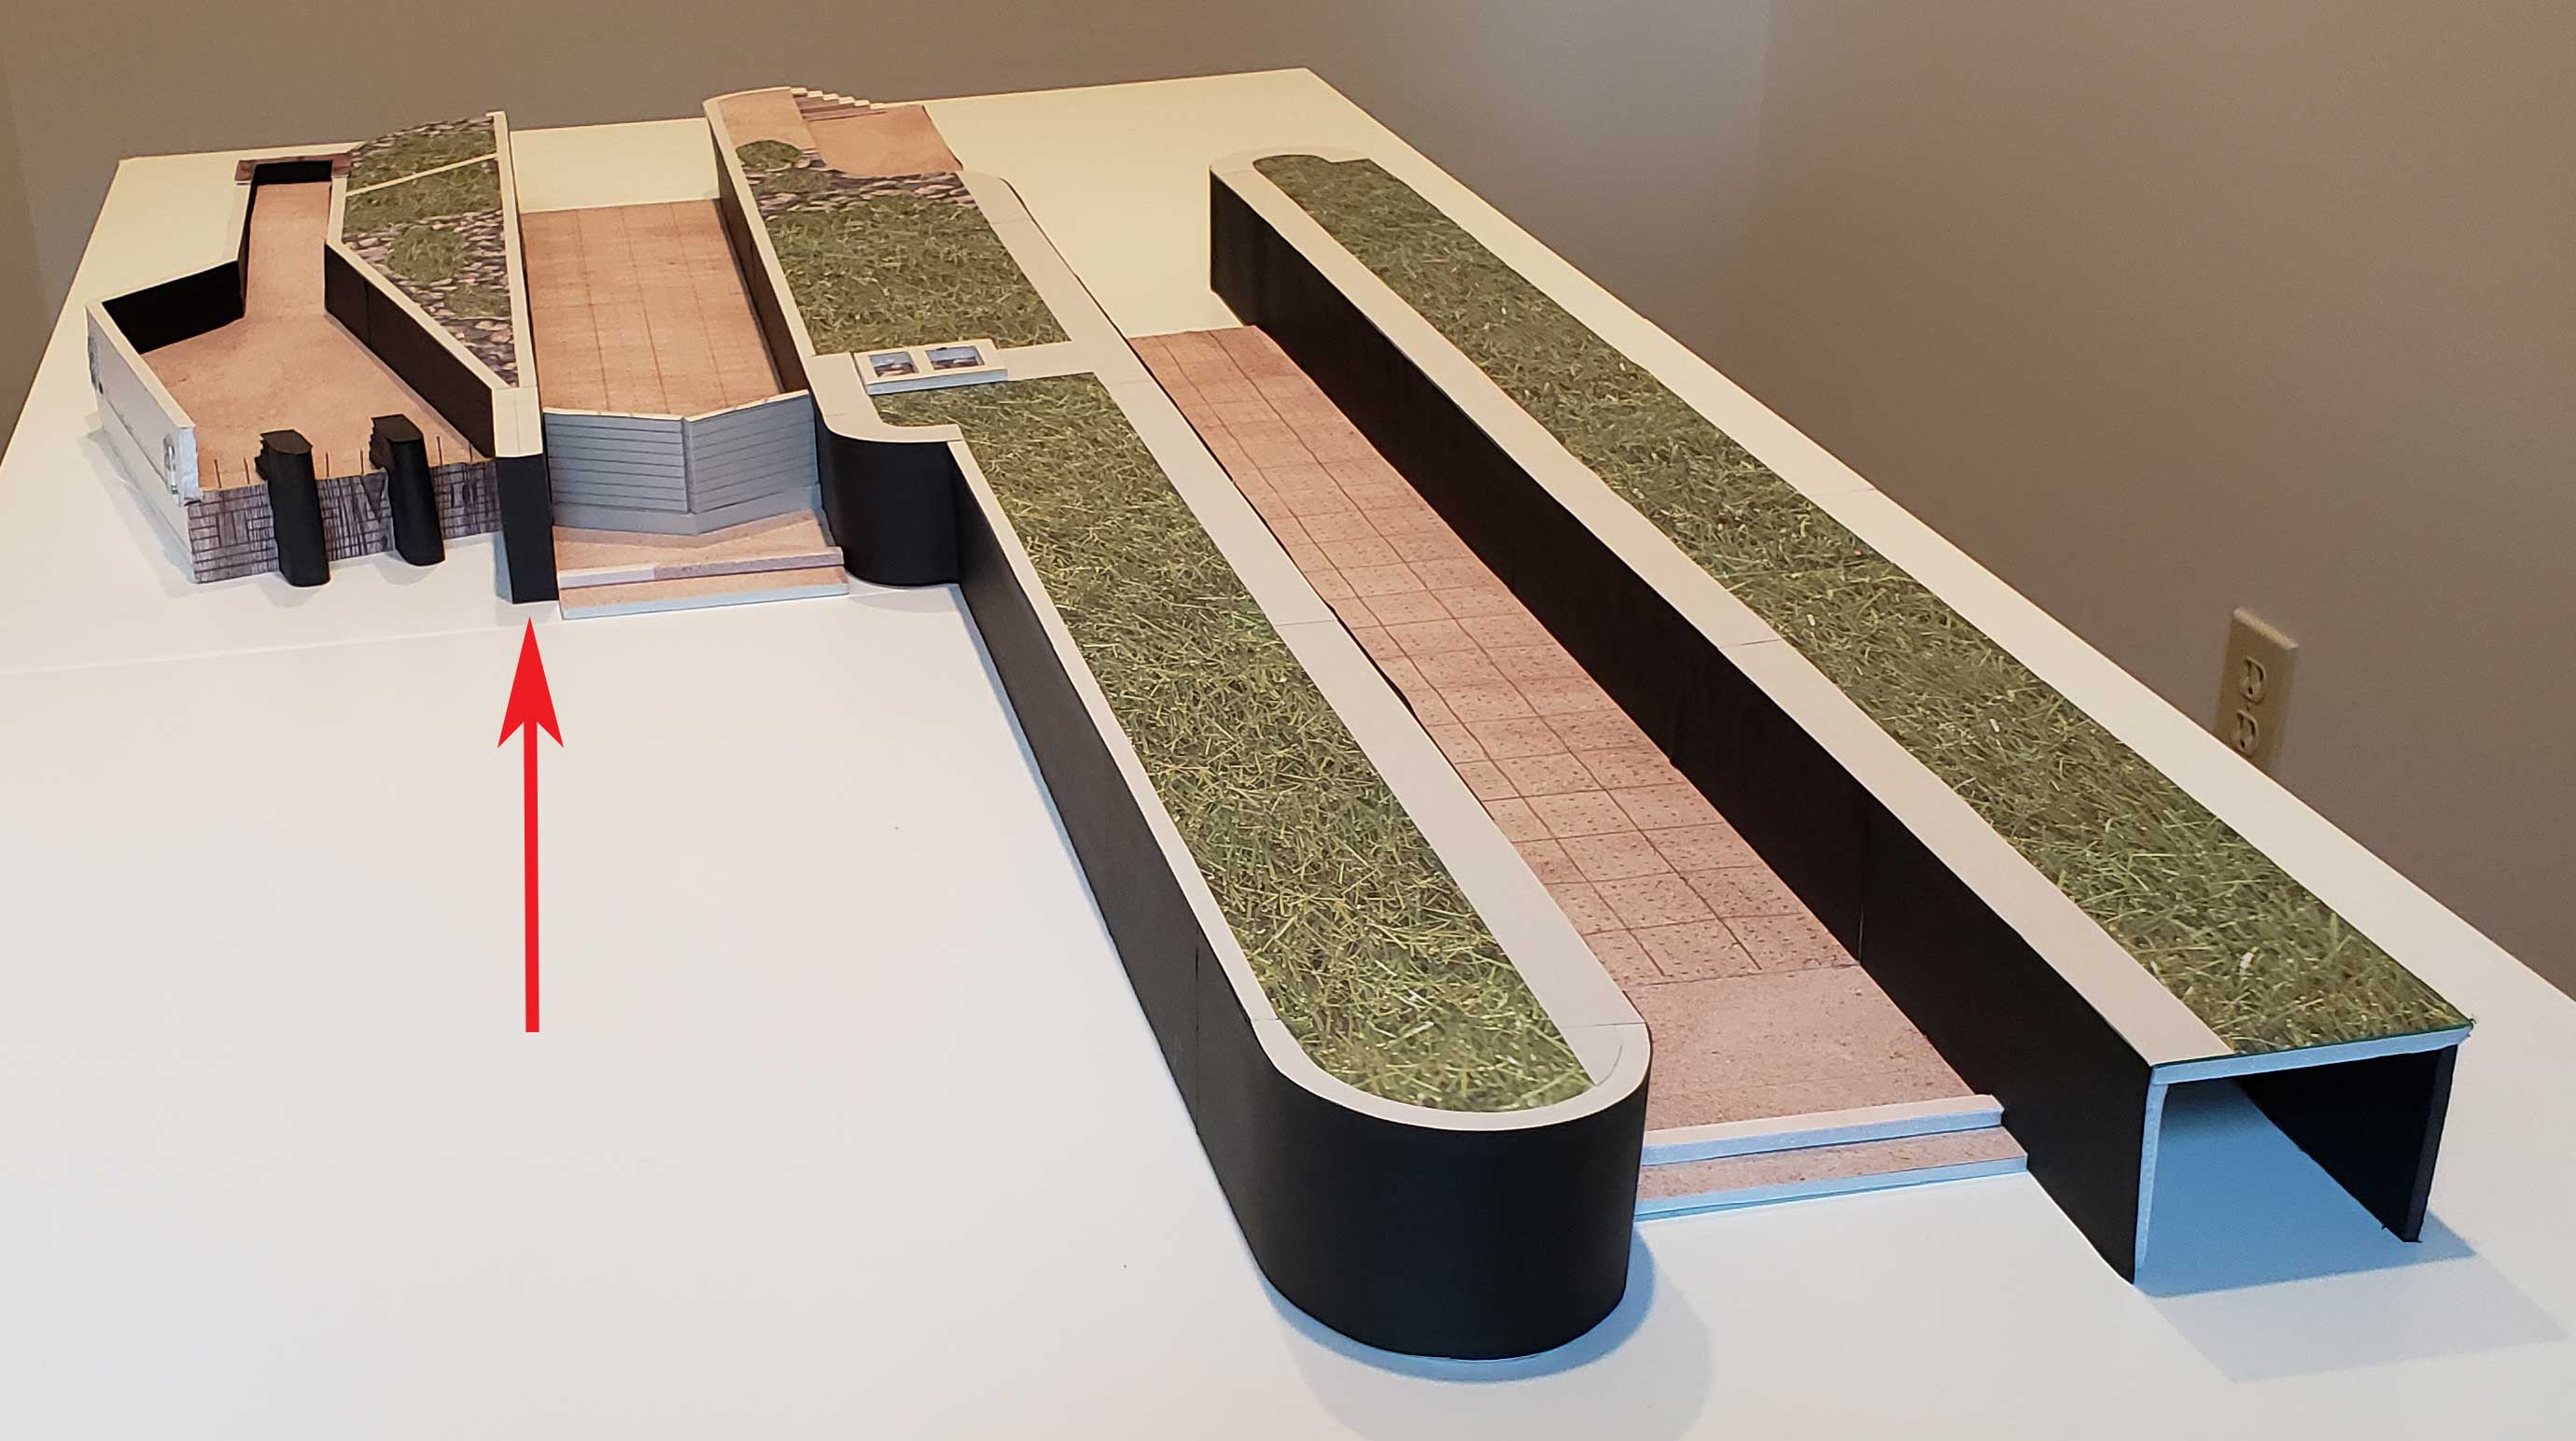
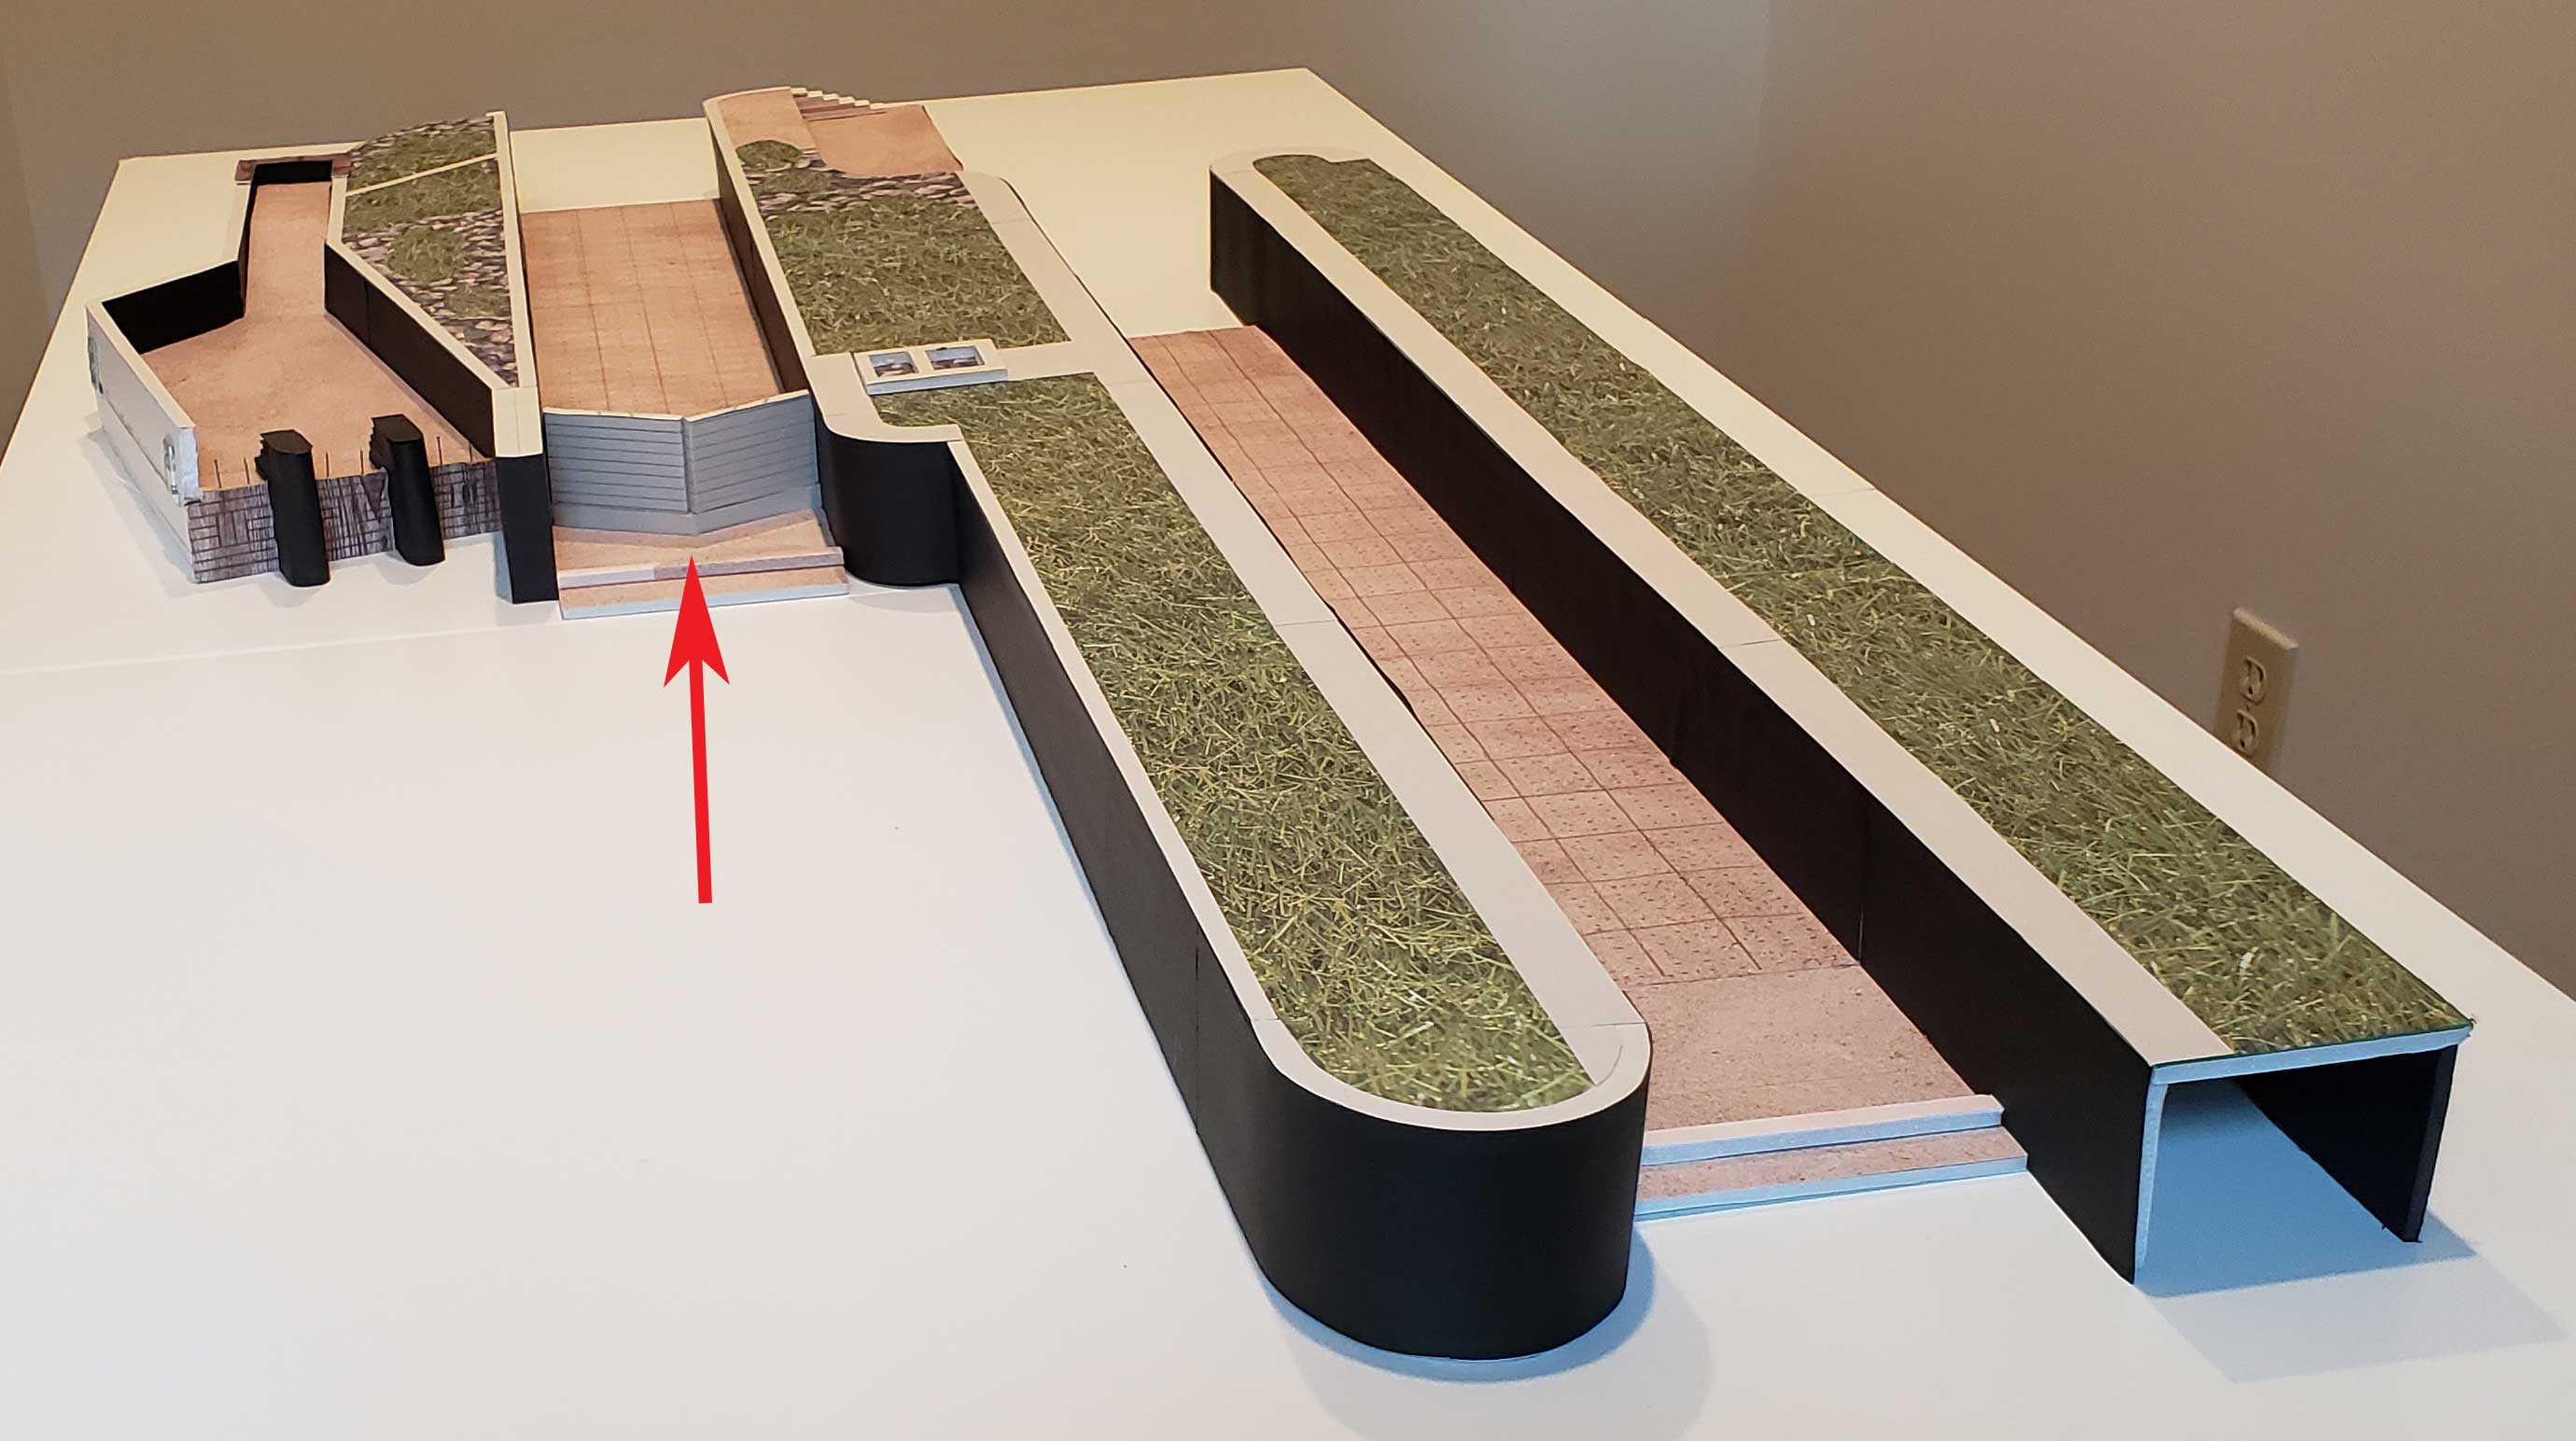
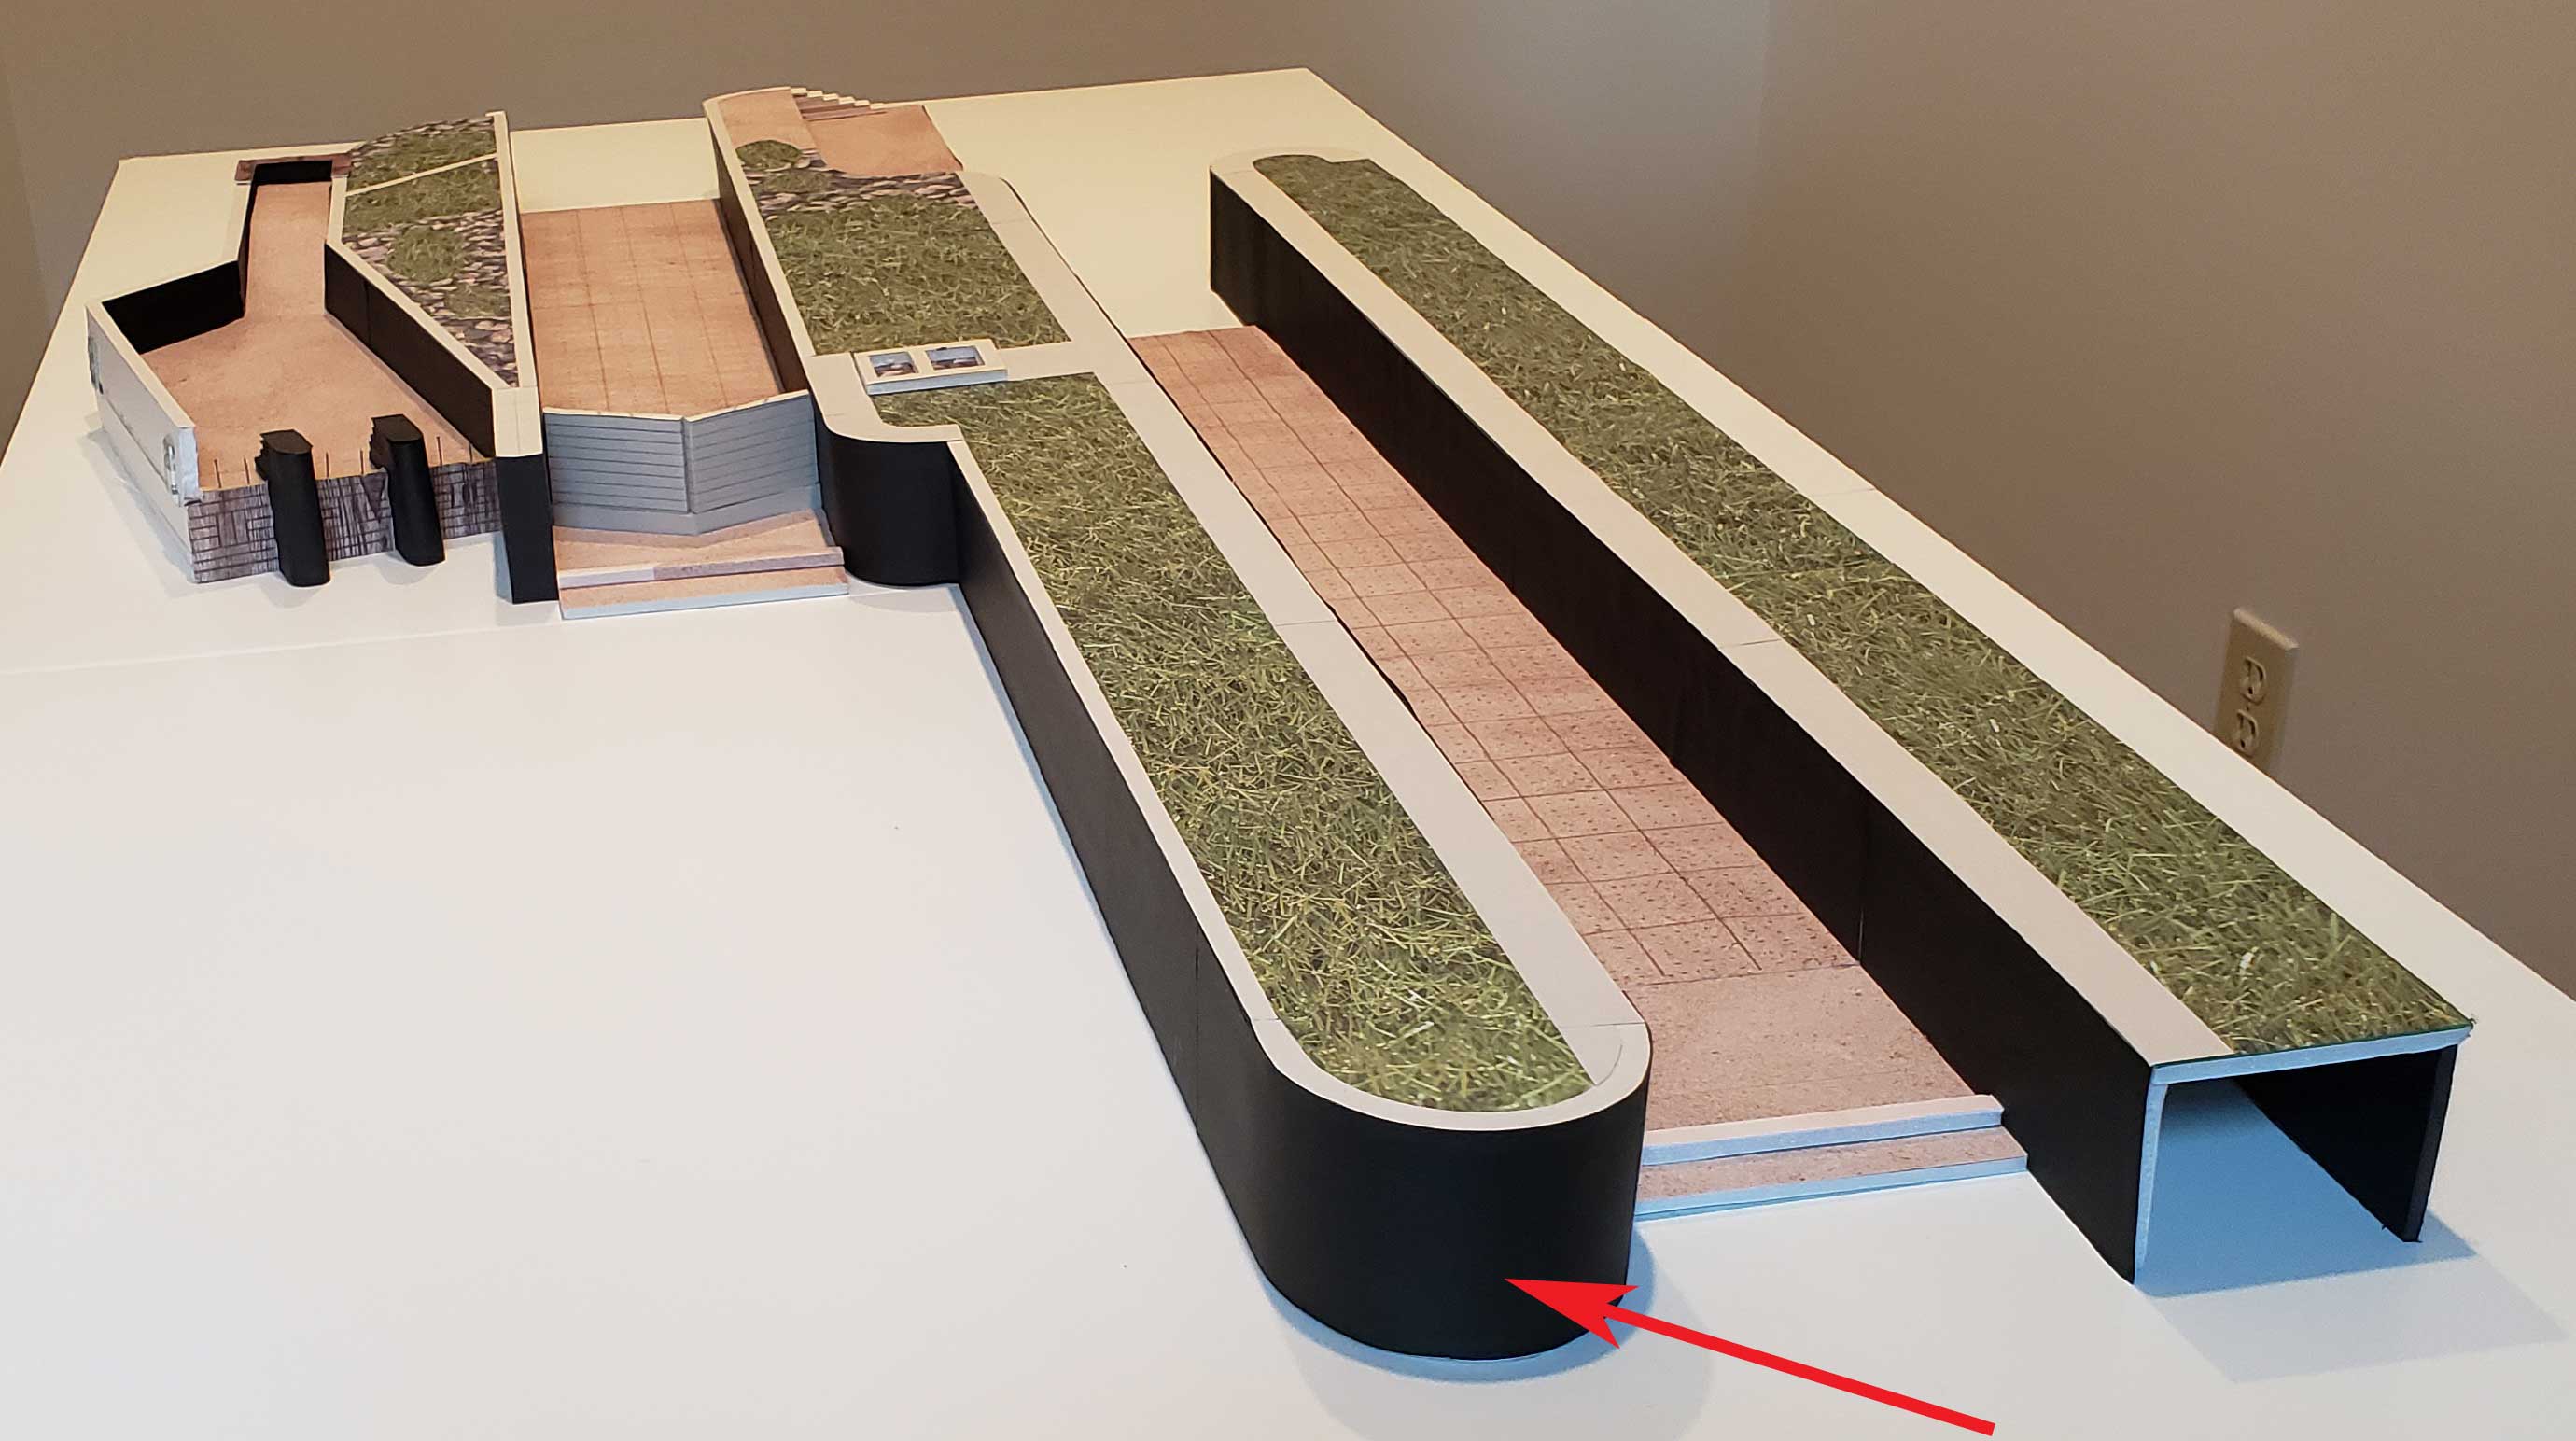
At this point I’ll start using a 3D model that I built a couple of years ago. It will give you a better idea of the lock structures.
Please note: I am using feet rather than metres – the depth changes are small and I find it easier. Convert 1 foot to 0.3 metres if you need to.


Before you think, “this’ll be easy”, there are a couple of things to consider, which I’ll go over in detail in the next post.
(1) The current flows evenly for the first 80% of your drift… but as you approach those enormous structures, it must divide. Depending upon your location, you’ll find yourself getting pulled either to the left or to the right and you must be vigilant about maintaining your depth.
(2) As you get even closer, you’ll encounter the berms I frequently make note of – those piles of rocks and silt (and junk, including a lot of bottles) in front of each interruption to flow, their size depending upon the size of the structure. These berms obviously change your depth – and you rise. Unless you’re prepared for it, you get confused and try to get back to your planned depth, but that will take you away from your original line. Experience more than anything else will help. The berms are 1-2 feet high.
Practice is the key element here. In my next post, I’ll show you some videos of the differences in river bottom at different depths, which can be quite subtle, and what changes as you get close to the locks.
