
August 2020 – this is the next post to be updated. The main difference now is that the 3 cribs at the end are more dilapidated. I’ll also add some videos.
When you reach the foundations of the hydroelectric plant itself, you’ll find bricks: lots of red bricks piled at the bottom of the plant’s concrete wall with a few still partially affixed at its top.


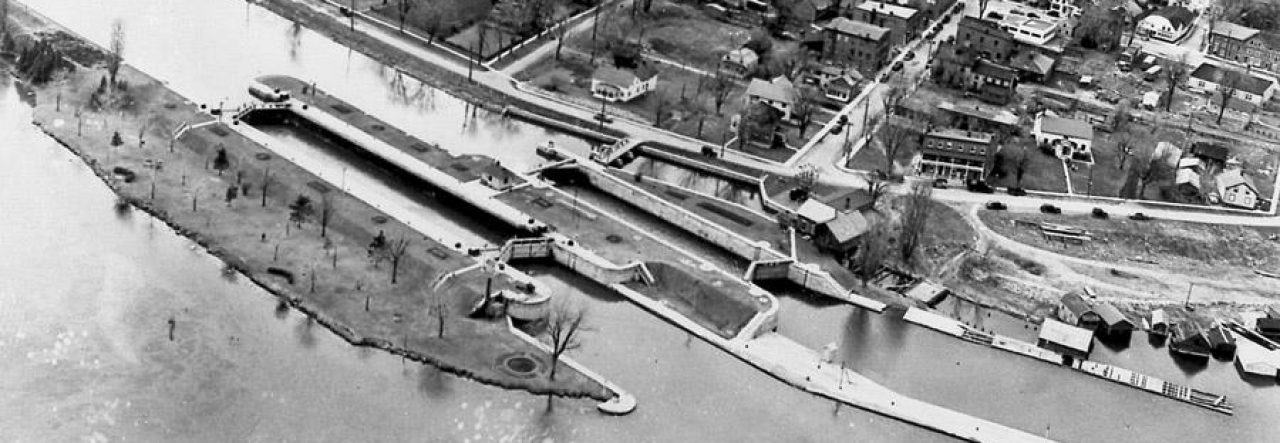
Pay attention to your direction at the top of the wall. Moving east over it with the current will carry you through the area of the turbine and tailrace. Moving south (to your right) will take you into the downstream area of the Rapide Plat Lock.
When you slip over the wall and descend, you’ll note a 12-foot drop in depth. 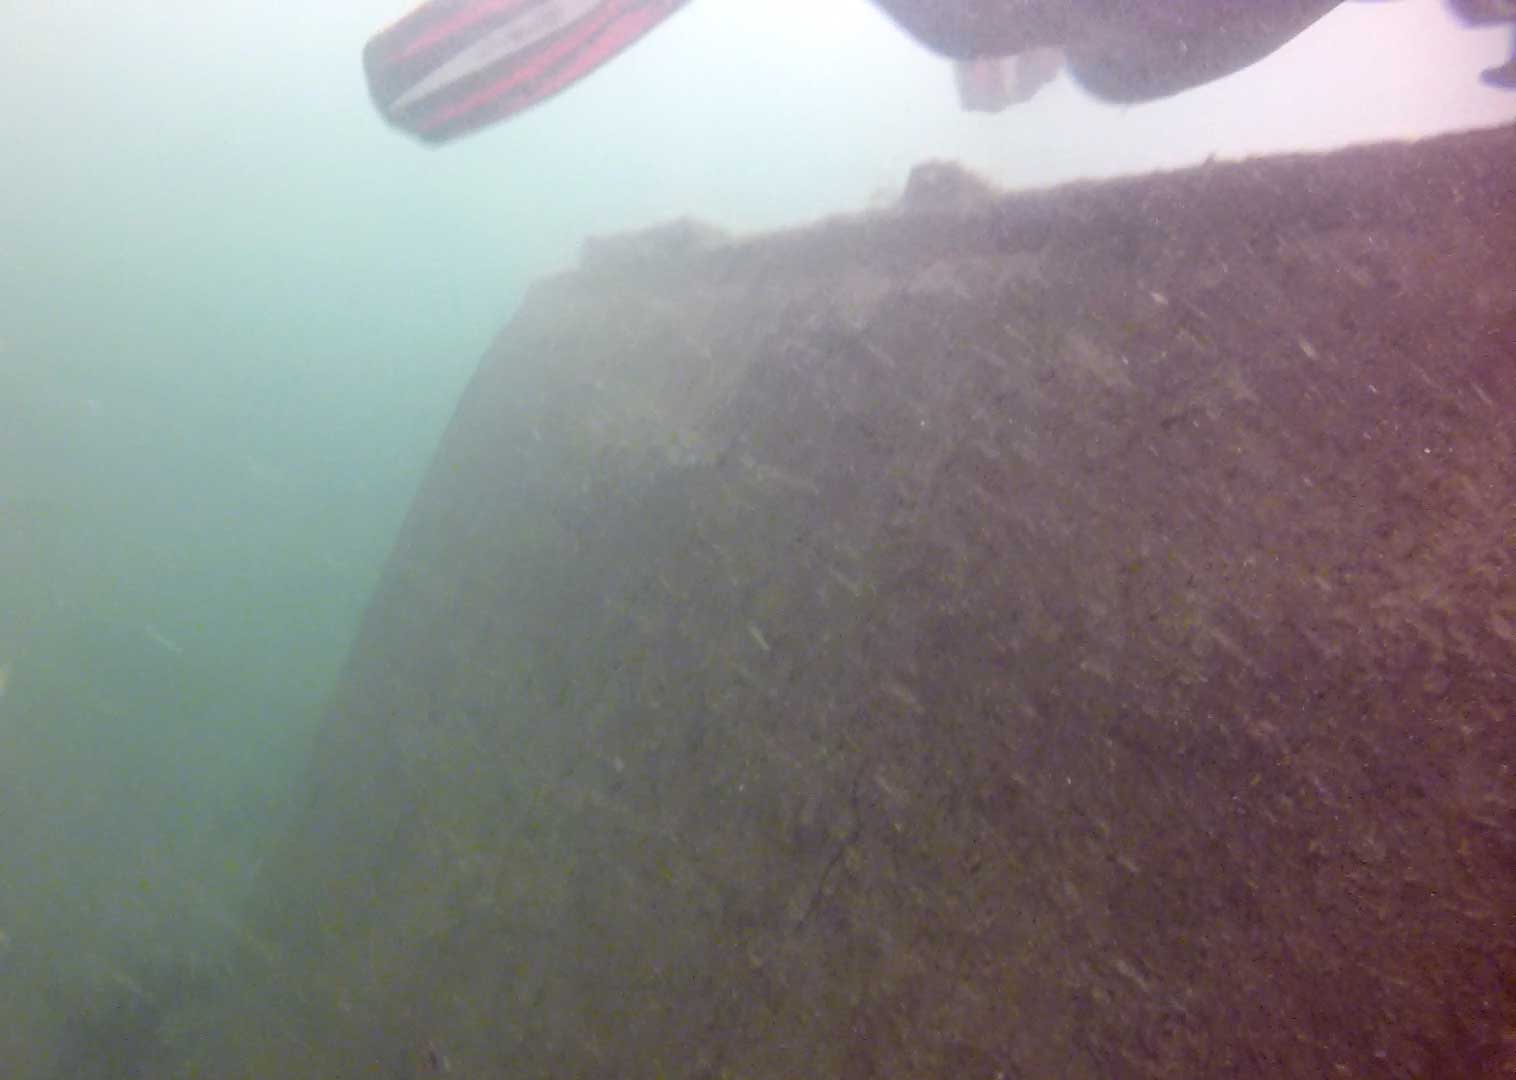
If you move to your left (north), you’ll see a large tree stump on the north embankment. If you move to your right (south), you’ll see the shorter, wider stump on the wall between the plant and lock. The south stump is considerably larger and therefore a good landmark.


On the northern bank area of the tailrace, there are a lot of small posts and debris to examine. The depth of this northern “shoreline” gradually rises to 12-15 feet and becomes weedy. You don’t want to exit here – you are still a long way from shore.


The dive route itself is to the east, through the tailrace area and a multitude of posts and supports from docks and boathouses. There are back eddies at the beginning but as you move along, the current drops substantially. You can take your time investigating all there is to see here. Below are the tall landmark posts of the tailrace.


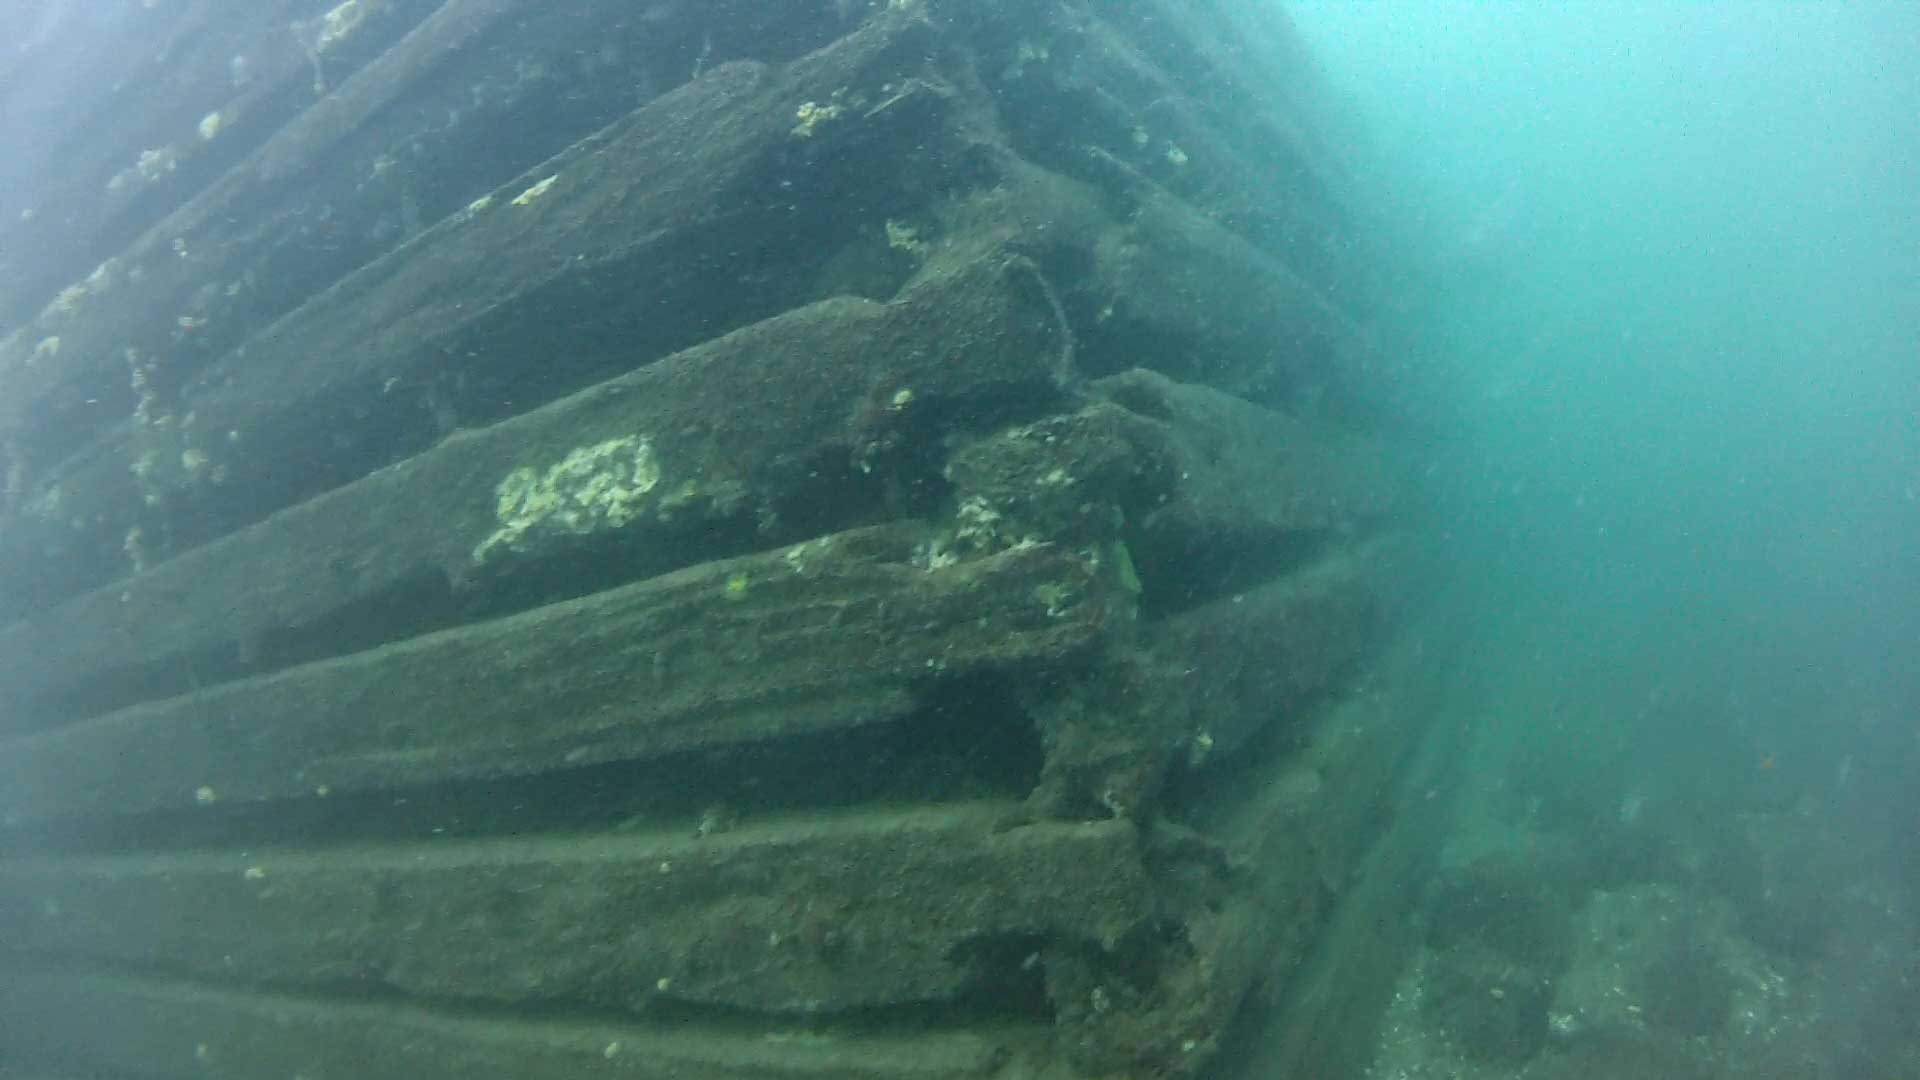
To the right (south) of these are three large cribbings distinct from the stonework leading downstream from the plant. These structures supported the dock running eastward. They are the major landmarks that lead you to the end of this route.
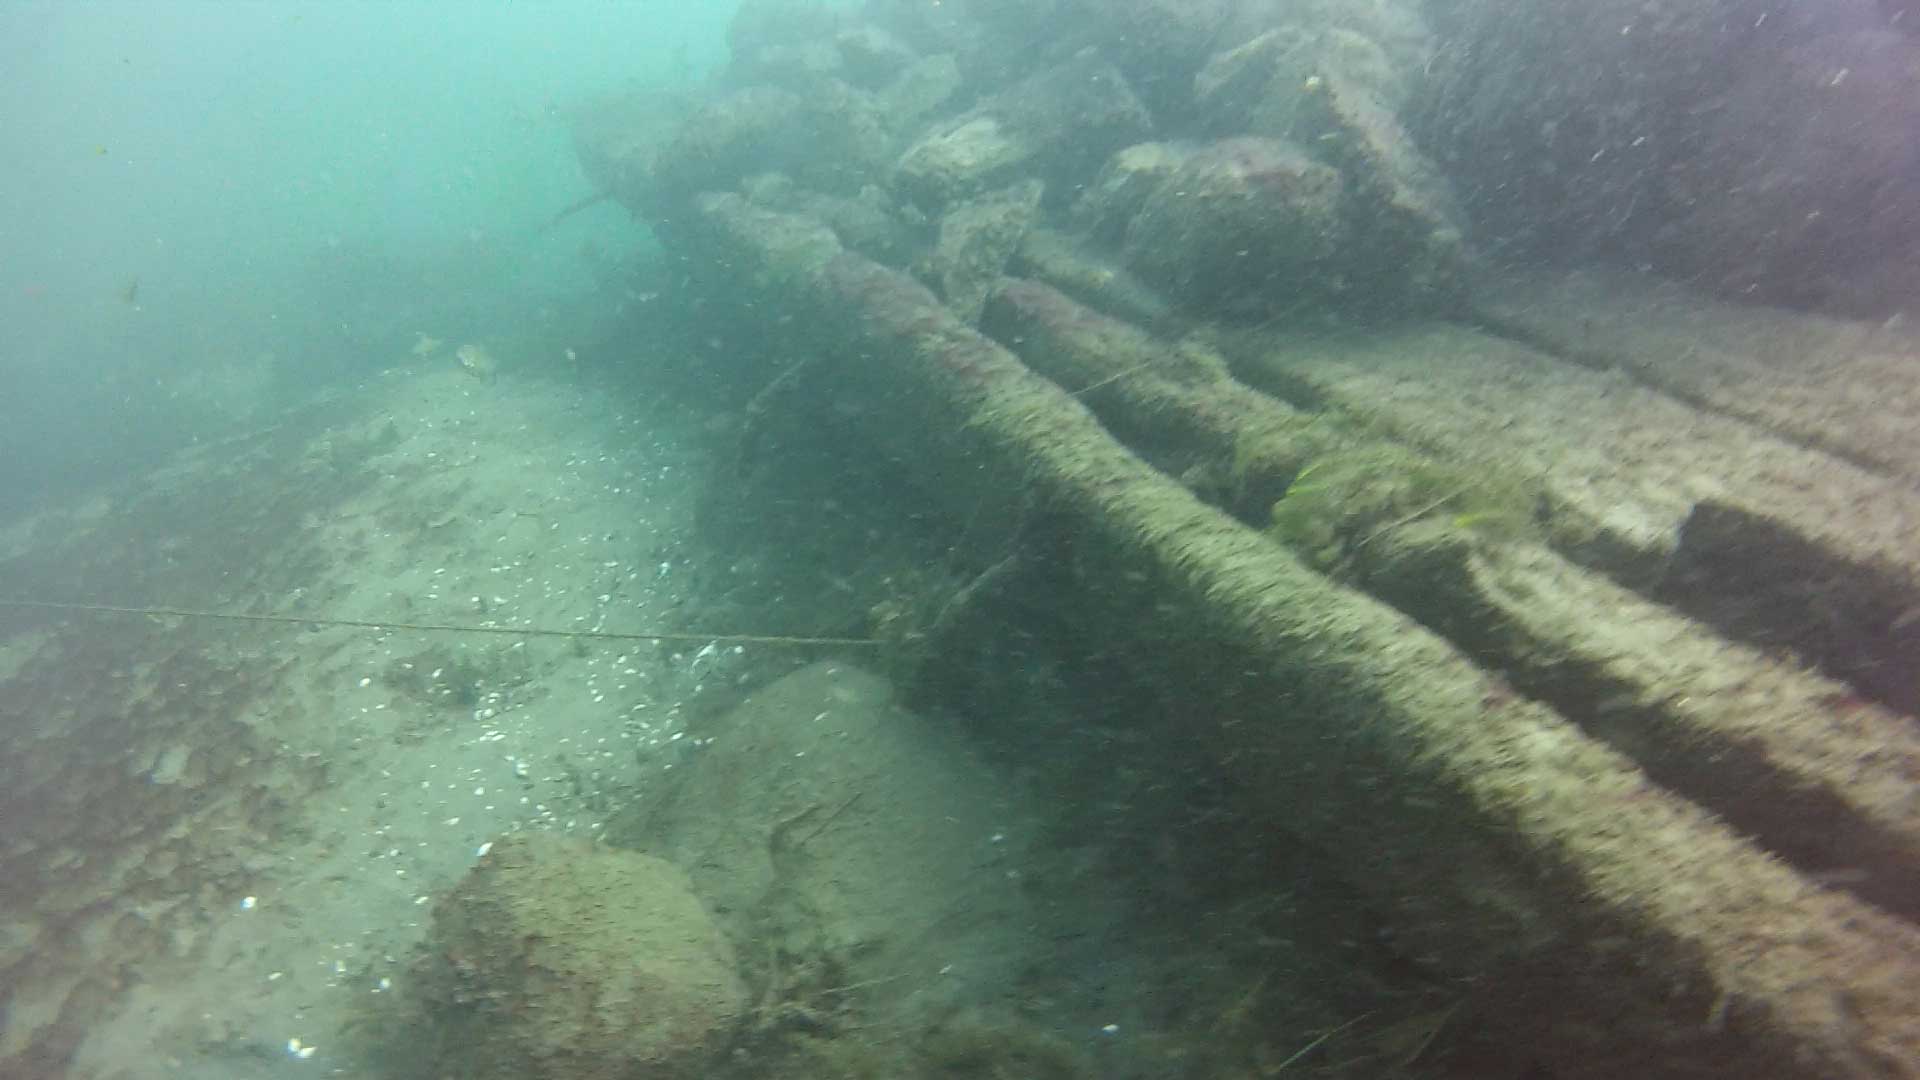
Although built with similar dimensions, they’ve been variably affected by the river’s flow. The first has sustained the greatest damage; the third is nearly intact. They are all large and interesting to explore, with large beams along their sides and tops filled with round stones. Each of them has a series of iron rods protruding from the top beams.
The visibility between the cribbings can be poor so that when you are at one you may not be able to see the next until you get close to it. It is important to know when you’re at the final cribbing because it marks the spot at which you change course toward the exit.
Crib 1: Broken with contents strewn about. The beam with its iron rods, normally found on the top, is lying on the ground. The second crib is barely visible in the distance.


Crib 2: In better shape.


Crib 3: In the best shape. Paying attention to the steel bar positions along the top helps you know which crib you’re at when visibility is reduced.


Follow the 3rd cribbing around its base to its NE corner where you’ll see a line attached and extending northward towards shore.
This is an important landmark for choosing your route home – following the line is one of your options. More about this in a separate post.
